Showing posts with label crafts. Show all posts

Tuesday, December 23, 2014

Christmas Lite


I didn't go over the top decorating for Christmas this year and I like it. Sometimes simple can be better. Our tree last year was just too full and too big and by Christmas day I felt claustrophobic with Christmas clutter. This year most everything is gold, silver and green which is perfect for our small house. I did the planters outside of our front door with cedar, pine and magnolia, adding some sprayed gold sprigs and glittered pinecones. Chris wrapped the posts in lights and I added a boxwood wreath to the front door. Inside, a few more wreaths, some lighted gold glittered tress, green garland, the new advent calendar and our Christmas tree. That's it.

Last weekend we trimmed our tree - a rather sparse Charlie Brown - and I swear the thing has more ornaments than branches. Lights are dripping off the boughs with three or four ornaments each but boy is it sparkly. For the first time ever I have wrapped all of my gifts, including stocking stuffers, with time to spare. I used kraft paper leftover from an event and tied the presents with organza ribbon in olive green or black and white stripe grosgrain. For tags I used mini chalkboard closepins I had in my candy bar supplies and not only do they look great, I can pat myself on the back for coming up with a pretty yet sustainable wrapping accoutrement. Matchy-matchy gifts also make my a-type personality awfully happy.


Christmas Lite, it's a good thing.

Thursday, December 11, 2014

Our Advent Calendar


I did it, I showed that white felt who was boss and made a really amazing advent calendar just in time for ... December 3rd! Close enough to the first of the month, right?

The process was more complicated and labour intensive than it needed to be, but once I started I was not going to give up. First, I cut out the pockets and decoratively top stitched them before gluing them to the felt base. I carefully glued every (painstakingly) hand-cut number to the pockets and for a finishing touch added my favourite pom-pom fringe in red. Phew, done! Nope, the glue holding the pockets to the base failed so I had to stitch them on, which took hours. Then the calendar still needed 'something more' so I made a ruffle with a piece of tartan and affixed ribbons to a dowel for hanging. The finished product is just what I had hoped: a lovely keepsake for Eloise and Spencer to enjoy for years.

I didn't get as far as organizing what would use to fill each calendar day but I've been able to get by with found objects. Leftover halloween candy filled days three, four, five, a necklace from a recent wedding event was perfect for day six, I went with a candy cane for day seven, a Kinder Surprise snuck into the cart at the grocery store for day eight and Lindt truffles from my personal stash for day nine, ten and eleven. Except Eloise informed me today she doesn't like Lindt truffles... and would prefer Pez. Not up to her, but I also happen to have a Pez refill kicking around so she just might be onto something. 

Wednesday, November 26, 2014

The Problem with White Felt

{pinterest}

I'm all about making special Christmas memories for Eloise and Spencer and now that November is nearly over, it's time to get this Christmas show on the road.

Chris took Eloise to Walmart on the weekend in search of lights for the cherry tree in the backyard and to wrap around the pillars at our front door. We both really, really hate Walmart for all sorts of reasons and I know it took a lot for Chris to willingly make the trip. The only problem is that the lights he brought home were the LED "cool white", which I despise. I think they look eerie and make everything feel cold and uninviting, good for Halloween, not for Christmas. Chris was understandably unimpressed when I explained that the lights will have to be returned. His look in response told me I will be the one responsible for taking them back.

Lights we'll figure out later, my focus now is on an advent calendar. Last year I bought a bunch of felt to 'whip' up an advent calendar but never got around to it. This year I am determined to create something that will become a family Christmas tradition for years to come. I want to make a special advent calendar that we can use annually and fill with little surprises - a candy cane, a hair bow, a tree ornament - for the kids to open each day instead of purchasing throw-away chocolate calendars year after year. The problem is I don't know where to start. So far I have two metres of white felt and no plan. I just keep starting at it expecting something to come to me, but no luck. There is something considerably uninspiring about white felt and perhaps that was my first mistake.

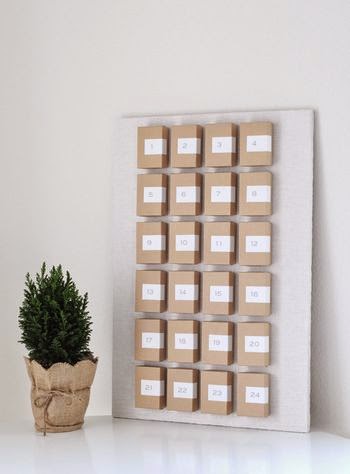
I have been cruising Pinterest for ideas and there are so many good ones for advent calendars!  Some of the sweetest advent calendars I've come across are as simple as paper packages clipped with numbered clothespins or small craft boxes glued to a board and stamped muslin bags strung on garland. Sadly, none of these involve felt. 

{pinterest}
{pinterest}


Sunday, October 27, 2013

Little Mommy

I read on Friday that there are 60 days until Christmas (thanks a lot Globe & Mail), which means that as of today there are only 58. Forget that Halloween hasn't even happened, my wheels are spinning to dream up crafts and gifts for what I consider the MOST wonderful time of the year. 

Eloise has entered a very nurturing "little mommy" stage and I am in full support of this. I was obsessed with my dolls as a girl and I'm quite happy to feed into Eloise's desire to play with them too. When she's not playing mommy to her main squeezes, Piggy & Pengy, Eloise takes great care of her doll, Baby Emma. Emma gets pushed around in her stroller and carried everywhere in her little bed but Eloise informed me that she would really like for Santa to bring Emma "a susu and some cwoving". Santa is on it. 

{amazon}

As it turns out, furnishing an entire wardrobe for Baby Emma - a Mon Premier Tidoo Doll from Corolle - is going to be expensive. Any outfits I can find that fit this particular doll, and the pickings are kinda slim, run around $25. I can do better than that! 

(Except for this one... this Corolle outfit is going to be pretty hard to top.)

{indigo}

A quick look on Etsy and EBay for 12" baby doll clothing didn't give me much more so I'm going to do what I usually end up doing and just make it. I can fudge the patterns by copying Baby Emma's own sleeper and use beautiful fabric scraps and fancy trimmings to sew up "cwoving" for Christmas. I'll end up getting the Corolle accessory pack as the "susu" seems to be really important to E, but the rest I can do myself. Baby Emma may even end up with new bedding for her possibly to-be-painted-turquoise crib. But with only 58 days and counting, I don't want to over commit. 

Sunday, February 10, 2013

Vintage Circus

I've done quite a bit of prep for Eloise's Circus party this weekend and while designing her invitations I came across these charming vintage circus animals on a site called The Graphics Fairy which is an absolute goldmine for images to use in craft and DIY projects. I'll be bookmarking this one for sure.


{the graphics fairy}

Just wait til you see the invitations I did!

Thursday, January 10, 2013

Blog Crush: Kate's Creative Space

Sometimes I come across the creative works of other people, especially other moms, and I'm awestruck at how they manage to think up and produce such things of beauty. It makes me want to do more, try harder and really push the boundaries of my own creativity.

I was led to Kate's Creative Space by a post on Apartment Therapy and I am absolutely blown away at the projects she creates for her young son, her family and their home. Her writing is thoughtful and honest, her projects absolutely inspiring and her DIY tutorials generous. I will be tuning in here often for shots of inspiration; have a look and you'll soon see why.

How charming is this Parisian Food Shop?

{Food Shop}

 A hardware and gas station:

{Harry's Hardware}

And my very favourite (so far) on Kate's Creative Space is this sack to hold Christmas gifts delivered by Santa. I will be making this next year, thank you Kate for the inspiration and excellent how-to.

{Santa Sack}

Wednesday, January 2, 2013

Eloise's Little Kitchen


A DIY play kitchen has been on my mind for a long time. The huge plastic monsters at big box stores just don't do it for me and I have always preferred the idea of repurposing an old piece of furniture into a little kitchen of my own making. I was lucky to come across a very inexpensive bedside table ($9!!) and with assistance from my parents - we're a crafty bunch - Eloise's play kitchen came to life, just in time for Christmas morning.

Here is what I started with, a 21.5" tall x 13.5" wide x 16.5" deep sad looking bedside table from the Salvation Army. It also had that classic 'thrift shop' smell. What is that anyway?


To get started I removed the hardware and marked out where the holes for the sink and oven door glass were to be. My Dad cut the holes and then I sanded and patched any holes with wood filler.

By this time the kitchen was starting to look much less like a bedside table. With just a few days to go before Christmas I finally got around to priming.


And finally, it was time to paint. I used leftover paint from our turquoise sideboard, which itself was a freebie. Two coats of paint, et voila!

Such a fabulous colour.

Next it was time for details. I used epoxy to adhere a piece of tinted plexiglass (cut to size at the hardware store) for the oven glass and a stainless steel bowl (only $0.49 at the Salvation Army) for the sink and let both dry over night. My dad helped me with the next parts which involved cutting a hole for the faucet and attaching 'hot/cold' handles with nuts and washers so they would spin. The faucet and handles themselves were literally found objects and I adore the brassy patina all three developed from being left out in the elements for some time.


The finishing touches involved sewing a little curtain using leftover fabric and feeding it onto a mini-compression rod saved from the Nook. The oven drawer handle and utensil storage rod are made from IKEA hardware and the hanging crock is from IKEA too. I painted on the stove burners with leftover grey paint from our fireplace and I created the coils by tracing any round items I could find with a sharpie. Very technical.


The stove knobs are some of the original hardware from the sideboard in our living room and I painted on temperature controls with red nail polish. A piece of MDF was glued into place where the bottom drawer used to be and it now serves as storage for extra cookware and play food. Last but not least, a press on LED light is glued inside the oven so Eloise can turn the light 'on' when she wants to check her baking and a retro timer my Mom found at Chapters let's her know when things are done. The 'ding' always makes her giggle.

Much of this project was put together using items we already had around the house and the few things that were purchased were not very expensive. More than anything, this project was a collaboration. I could not have created this kitchen without contributions from my Mom & Dad, cousin Anthony and girlfriend Aliy who made the most amazing coordinating apron and oven mitts which Eloise loving refers to as puppets. You all helped make a little girl's present really special!




Wednesday, December 26, 2012

Christmas Bliss


The Christmas bliss as I experienced through Eloise yesterday was unbelievably special. From the moment she woke until she finally succumbed to sleep 12 hours later she was a bundle of excitement, laughter and joy. She refused to nap - in fear of missing anything I gather - and crashed hard after playing with many, many, many lovely gifts and keeping us wholly entertained. We are so lucky to have such generosity in our lives.


I loved Christmas crafting this year with tulle, ribbon, baubles and glitter. I will admit a craft fail when it came to making snow globes - who knew striking the right balance between the amount of glycerin and glitter in the water was so precise to making it 'snow' -  but oh well, everything else turned out beautifully.

By far Eloise's play kitchen was my greatest achievement and I am pleased to say she loved it too. Watching her explore the kitchen for the first time yesterday morning and having her cook us 'eggs' all day today means that this present is exactly what I had hoped. I'll share the how-to soon.


Friday, December 21, 2012

Prime Time

You know what I realized this morning? Christmas is in just four days and I have not even primed Eloise's play kitchen. I've been putting it off with everything else going on (plus I hate painting), but you know what? There is just not enough time anymore. If Eloise is going to have her special present to play with on Christmas morning then it's prime time.

Chris took Eloise to Victoria yesterday to see family (I sadly couldn't go because of work) and as much as I miss them, their absence is giving me precious time to actually complete this project and the rest of my Christmas prep. I'm rocking out an all hip hop playlist and getting my paint on.

This is what the night stand looked like when I brought it home:


Then after my Dad cut out a hole for the sink and oven door and I sanded it:


And now, we prime.

Tuesday, December 18, 2012

All That Glitters

I have a new affinity for the colour gold. It's pretty trendy in home decor right now and thanks to blogs like The Glitter Guide, Kate Spade and J.Crew and magazines like Matchbook, gold is certainly having a very pretty resurgence.

I wrote the other night about an amazing glitter deer head that my friend Marjorie made, well I had to make one for my own. This was such an easy project! I couldn't get my printer to print a deer head silhouette the size I wanted to I just free handed it, added the glue and lots of gold glitter. Looks like I AM putting my degree in advanced arts & crafts to good use after all!

not bad, right?
Here are a few other gold items I'm coveting ...

{dwell studio}
{j.crew}
{mitchell gold + bob williams}

{kate spade}
{anthropologie}

{design within reach}


All that glitters is gold!

Saturday, December 15, 2012

Glitter Deer Silhouette

We had a lovely Christmas get together at a friend's today and I fell in love with an incredible deer silhouette she made in gold glitter for the holidays. It is stunning. The best part? She made it out of supplies purchased at the dollar store for less than three dollars!

Isn't it just lovely?
{pinterest}

Here is what you need to make a Glitter Deer Silhouette:

1. Print off a reindeer silhouette from the Internet
2. Trace onto a canvas (any size!)
3. Apply basic Elmer's glue with a paintbrush to silhouette
4. Cover in glitter!

I'll be making one of these tomorrow, and leaving up all year long. Thanks for the inspiration, Marjorie!

Friday, December 7, 2012

Salt Dough Ornaments

Remember making salt dough ornaments in preschool? I do. My mom still hangs them on our Christmas tree.

I thought salt dough would be an easy Christmas craft to do with Eloise so I found a recipe online and invited our friends Ashleigh & Sawyer over with the idea of doing hand prints of the kids to hang on the tree. Except Eloise would not put her hand in the dough ... "No, 's sticky!" she said.

Since Eloise wasn't in the crafting mood I used some cookie cutters and made a bunch of holly leaves, bells, trees and two random rhinos for the tree. Or maybe for gift tags.

Salt Dough

1/2 cup table salt
1 cup all purpose flour
1/2 cup warm water

Combine all ingredients mix for 5-8 minutes, until the dough has formed and is no longer sticky. Roll dough onto a floured surface, 1/4 inch thick. You'll need lots of flour for rolling. Once cut into desired shapes, bake ornaments at 200 degrees for 4 hours or until dry. I know this sounds like a long time but you want to bake them this long to avoid bubbles in the dough.

Before cutting out shapes I made a pattern on the rolled dough with a Christmas script stamp. My mom has an extensive collection of cookie cutters so I was able to sample from her stash, but you could even use a glass for a simple circle. Use a straw on skewer to make a hole for hanging.


This is one of my almost-finished ornaments. Pretty right? For the finishing touch I'm going to add some gold leaf.

Friday, November 23, 2012

Insta-shams

Here's the thing - I'm crafty but I'm a lazy crafter. I am impatient and not very good at following instructions. Most of all, I like instant gratification. This is why I'm not a very good painter.

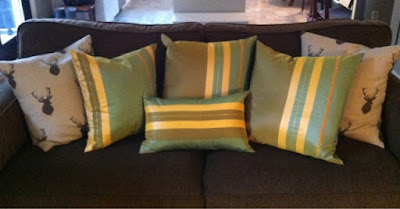
What I do like making are pillow shams, or Insta-shams as I call them, the easiest decor project. Give me a few metres of fabric and I can whip up a several shams, have them stuffed and on the bed/couch in around an hour. I can sew of course, but I don't sew very well. My mom will tell you this because I skip steps (ahem, pinning) and didn't have the same strict instruction she did, and you know what, she's absolutely right. But I also attribute my questionable sewing partly to laziness. I may not be able to draft a pattern or drape a dress but I can roll out some mighty pretty pillow shams and a fleece bathrobe no problem. I'll leave the tough stuff to my Mom (love ya!)

I got home around eight last night with a plan to head straight to bed but was lured to the dining room table by the sewing machine which I had set up earlier today. And so I made four new pillow shams out of some gorgeous striped fabric I  have been hanging onto for years and they turned out beautifully.

Think you can't make a pillow sham? I challenge you to give my Insta-shams a try with these four simple steps:


And... TA-DA!